How to Install Proxmox on the Raspberry Pi
Source
- Type: webpage
- Origin: https://pimylifeup.com/raspberry-pi-proxmox/
- Imported: 2026-06-11
- Images: 5 downloaded to
./assets/pimylifeup-raspberry-pi-proxmox/(thumbnail, Postfix prompts, login, web interface)
Content
Proxmox Virtual Environment is an open-source virtualization platform with a powerful web interface for managing virtual machines and containers on a Raspberry Pi. Recent Proxmox VE releases support ARM systems, but the upstream project does not ship ARM64 builds. This guide uses PXVirt, a third-party fork that maintains feature parity with Proxmox VE and adds ARM optimizations.
- Bookworm → Proxmox 8
- Trixie → Proxmox 9
Use a clean 64-bit Raspberry Pi OS Lite install (Bookworm or Trixie). Avoid heavy VMs; newer Pis (especially Pi 5) work best.
Requirements
- Raspberry Pi OS Lite 64-bit (Bookworm or Trixie)
- Static IP address (DHCP reservation recommended)
- Clean OS install recommended
Preparing the Raspberry Pi
- Update packages:
sudo apt update
sudo apt upgrade- Install curl (needed for the PXVirt GPG key):
sudo apt install curl- Configure a static IP (router DHCP reservation or Pi-side config).
Modify /etc/hosts
Proxmox expects the hostname to resolve to the Pi’s LAN IP, not 127.0.0.1.
sudo nano /etc/hostsChange:
127.0.0.1 raspberrypiTo (replace with your Pi’s IP):
192.168.0.32 raspberrypiVerify:
hostname --ip-addressDisable Cloud-Init hosts management
Cloud-init can overwrite /etc/hosts on reboot. Comment out update_etc_hosts:
sudo nano /etc/cloud/cloud.cfgUnder cloud_init_modules, change:
- update_etc_hostsTo:
# - update_etc_hostsSet root password
Required for Proxmox web login:
sudo passwd rootAdd the PXVirt repository
- Import GPG key:
curl -L https://mirrors.lierfang.com/pxcloud/lierfang.gpg | sudo tee /usr/share/keyrings/lierfang.gpg >/dev/null- Load OS codename:
source /etc/os-release- Add repository:
echo "deb [arch=arm64 signed-by=/usr/share/keyrings/lierfang.gpg] https://mirrors.lierfang.com/pxcloud/pxvirt $VERSION_CODENAME main" | sudo tee /etc/apt/sources.list.d/pveport.list- Refresh package lists:
sudo apt updatePrepare networking for Proxmox
Disable NetworkManager
sudo systemctl disable NetworkManager
sudo systemctl stop NetworkManager
sudo systemctl mask NetworkManager
Install ifupdown2
sudo apt install ifupdown2If you see error: Another instance of this program is already running.:
sudo rm /tmp/.ifupdown2-first-install
sudo apt install ifupdown2
Configure /etc/network/interfaces
sudo nano /etc/network/interfacesAdd (replace placeholders):
auto lo
  iface lo inet loopback

auto eth0
  iface eth0 inet manual

auto vmbr0
iface vmbr0 inet manual
        address <IPADDRESS>
        gateway <GATEWAY>
        dns-nameservers <DNS>
        netmask 255.255.255.0
        bridge-ports eth0
        bridge-stp off
        bridge-fd 0
Example:
auto lo
  iface lo inet loopback

auto eth0
  iface eth0 inet manual

auto vmbr0
iface vmbr0 inet manual
        address 192.168.0.200
        gateway 192.168.0.1
        dns-nameservers 1.1.1.1 1.0.0.1
        netmask 255.255.255.0
        bridge-ports eth0
        bridge-stp off
        bridge-fd 0
Reboot to apply:
sudo rebootInstall Proxmox VE
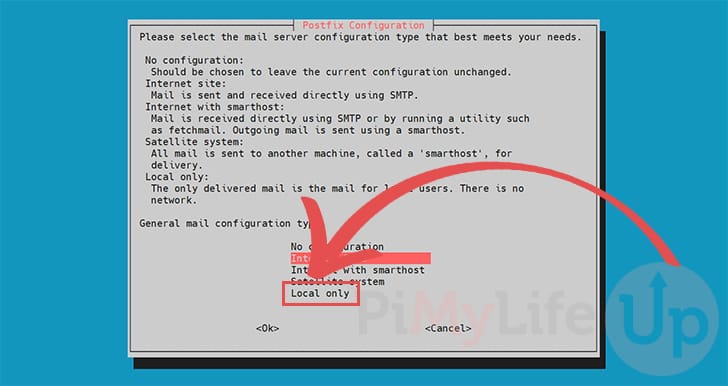
sudo apt install proxmox-ve postfix open-iscsi pve-edk2-firmware-aarch64During Postfix setup, choose Local only if unsure:
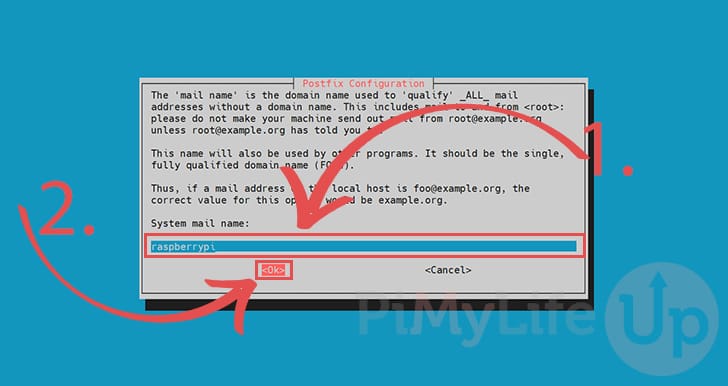
Leave the default system mail name unless you know otherwise:
If installation fails with Errors were encountered while processing: pxvirt-spdk, re-run the install command.
Access the web interface
Get the Pi IP:
hostname -IOpen in a browser:
https://<IPADDRESS>:8006Log in as root with the password set earlier:
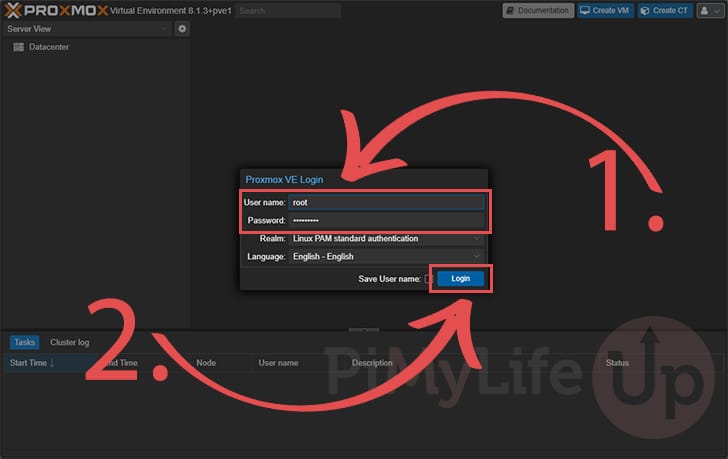
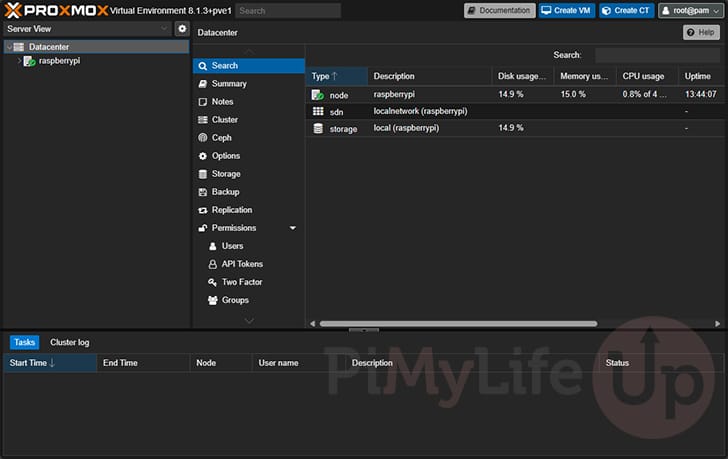
After login, use the web UI to create VMs and configure the host:
Key Takeaways
- Official Proxmox VE has no ARM64 builds; PXVirt is the third-party fork used for Raspberry Pi.
- Requires 64-bit Raspberry Pi OS Lite (Bookworm or Trixie), a static IP, and hostname/IP alignment in
/etc/hosts. - Disable NetworkManager and configure
vmbr0bridging before install to avoid losing network access. - Web UI:
https://<pi-ip>:8006as userroot. - Keep VM workloads light; Pi 5 is the recommended hardware class for this experiment.